
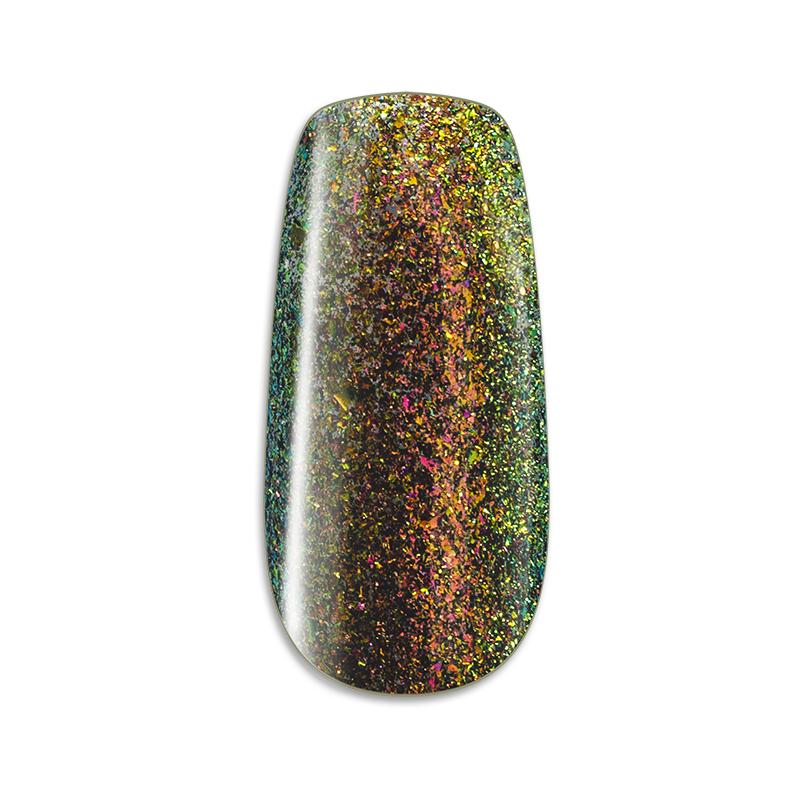
LacGel LaQ X Gel Lacquer - Cosmic Shine X093 - Galaxy 4 ml
Estimated Shipping Widget will be displayed here!

Couldn't load pickup availability
Pickup available at Műköröm Bolt - Nail Shop
Usually ready in 4 hoursRelated product(s)
LacGel LaQ X Gel Lacquer - Cosmic Shine X093 - Galaxy 4 ml
Product description
Perfect Nails LACGEL LAQ X GEL POLISH
X, as an extra color experience! This means that its colors are up to 30% more pigmented, its gel polishes have a creamier texture, providing an X - experience that will help you perfect your gel polish technique. We surprise you with ever-expanding collections of truly seductive, hot, intense colors! Isn't it fantastic?
Our new development is accompanied by a special procedure. With the "dry" brush Russian technique, you can learn the easiest and most economical way to use our LAQ X gel polishes. Master every little movement of this special method within the framework of our soon-to-be-launched LAQ X technical Workshops and work precisely and time-savingly with extremely pigmented colors.
Our new bottles and brushes are now available not only with our LaQ X gel polish product line, so it also brought with it the X-brush and its special bottle used for the "dry" brush Russian technique! Why is it so great?
- Color swatch cap: Actual color representation, so you can easily find your favorites in your drawer!
- Silk-matte cap: Non-slip grip even in the sweatiest situations.
- X - brush: Its precision cut is simply perfect, child's play with the fan-shaped shape of perfect varnishing.
- Designer glass: Its elegant design and wider shape fit better in your hand than ever.
Attention! Shake or stir with a spatula before use to ensure even pigment distribution.
LACGEL LAQ X PROPERTIES:
A creamy, soft-spreading gel polish family that forms a transition between colored gels and nail polishes. Up to 3-4 weeks of scratch-, wear-, and chip-free results! Ideal for manicures, pedicures, on top of artificial nails, and nail decoration. Requires a base and top coat.
- Consistency: medium thick (3)
- Flexibility: flexible (2)
- Solubility: insoluble (1)
- Curing: 2-3 minutes in UV lamp / 30-60 seconds in LED lamp
- Post-curing consistency/fixation: After curing, a precipitated dispersion layer is formed.
- Surface/gloss after curing: After curing (fixing), the surface is matte. (4 = gloss gel required.)
- Removal: with a file
HOW TO USE IT?
- Preparation: Cuticle push, scraping, nail shaping, feathering: prepare the nail surface with a fine buffer.
- Cleaning/preparation: Cleaning, degreasing, and dehydrating the nail with Perfect Prep preparation liquid
- Adhesion enhancer: (optional step) If necessary, for even better adhesion, Perfect Bond Primer adhesion enhancer, liquid adhesive film can be used. (After 20 seconds of drying time, the surface remains sticky to ensure good adhesion) WARNING: This provides better adhesion on problematic nails and in cases of greater stress, but it increases the time for removal)
- Base gel: Forms an adhesive layer, strengthens the natural nail and prevents discoloration of your own nail.
- Recommended for colorless base gels: LacGEL Base&Top / Bond Gel Vitamine+ / Hardener Gel / Elastic Hard Gel
- Curing: Curing time and method based on the specifications of the selected base gel.
- Color: Apply a thin layer of colored LacGel LAQ X with lacquering movements, taking care not to get it on the skin. WARNING: apply very thinly, with an almost dry brush!
- Knitting: It is recommended to knit finger by finger, working on alternating hands, to ensure that the nail edges are covered by the material!
- Topcoat: Curing time and method based on the specifications of the selected topcoat.
- Recommended gel polishes for gel polish: LacGEL Base&Top / No Cleanse Top Shield / Flexi Top Gloss /Cool Shine Ever
- Curing: With fixative gel polish, a fixative must be used after curing.
Perfect Tip
You can make your nails more durable in 2 ways: by using 2 base gels together, e.g. Bond Gel Vitamine+ + bonding + Hardener Gel or Elastic Hard Gel under the color. For problematic nails, Perfect Bond primer can be used after Perfect Prep. However, this will make it more difficult to remove!
Removal
Use a 180-grit file to open the lid seal, then soak the cotton wool in the foil with acetone and place the release foil on your fingers. After the exposure time has elapsed, remove the foil. After removing the foil, use an orange stick or metal skin scraper to scrape off the dissolved material. The dissolved material will remain completely in the foil.
If you have any questions, don't hesitate to contact us! We are always here to help. We will respond within 24 hours on working days.
Shipping Information
Delivery to European Union countries!
Package tracking information
Information about package tracking and the use of DPD parcel points and parcel machines. More
Customer service
Please provide some details and we will help you find the best solution for you. You can contact us by phone, chat, e-mail and other ways.
We are available on weekdays (9:00-16:00 GMT).
F.A.Q
Visit our FAQ page, where you will find answers to common questions.